Project 2: Particle system

Due: Project 2.1 due on Feb 27, 2013, 10AM
Project 2.2 due on Mar 08, 2013, 10AM
You will implement a particle system to simulate three physical phenomena: (1) Galileo’s experiment, (2) a snow “cube”, and (3) a tinkertoy. These three tasks will require you to implement gravity force, constraint force, collision detection, collision response and at least two integration methods.
Requirements
Project 2.1
Galileo’s experiment: Involving three particles, gravitational force, and two integration methods.
A snow “cube”: Involving at least 50 particles, collision detection, collision response, gravitational force, and one integration method.
Project 2.2
Tinkerkoy: Involving one particle, constraint force, gravitational force, and one integration method.
Project 2.1: Galileo’s experiment
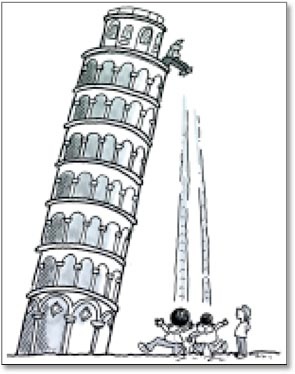
You will implement two numerical integration methods and show that one of them yields the same motion as the analytical solution, while the other one does not.
In your executable, show three particles side-by-side falling from 80 meters to the ground. Drop the particles at the same time with zero initial velocity. Render the particle that follows the analytical solution red and the other two blue. Draw a plane to indicate the ground.
Project 2.1: A snow “cube”

You will set up a particle system with at least 50 particles in the cube. You need to render the cube (wireframe is fine) and the particles (dots or small spheres) at each time step of the simulation. The particle system is under the gravitational force which can be modulated (e.g. set to a value less than -9.8) to create the effect of fluid dynamics.
The main challenge of this task is to implement collision detection and response. Here we assume a simple impulsive force occurs at the site of collision. That is, when a particle hits the wall of the cube, its velocity in the normal direction of the wall changes direction instantaneously. You can model tangential friction by discounting the tangential velocity after the collision, but it is not required.
Finally, your snow cube must be interactive. That is, the user can “shake” the cube by clicking on the cube and dragging the cursor in all four directions. The speed of the mouse movement should affect how strong you shake the snow cube.
Project 2.2: Tinkertoy
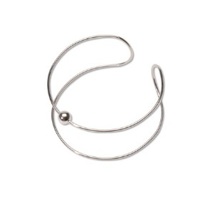
The constraint you need to implement can be represented as: C(px, py) = px2 + py2 - d2, where d is the radius of the circle C. You should initialize the particle at a position that satisfies constraint C.
If you are interested in building a tinkertoy with multiple constraints and particles to earn some extra credits, you should implement the constraint in the general form. Rather than hard-coding the whole system, you will build the constraint matrix on the fly by allowing each constraint to make its own contribution to the global Jacobian matrix and its time derivative matrix. If you just want to simulate one particle on the circle, you only need to implement a single implicit constraint, as described in the slides.
Extra credits: In order to build the global matrices and vectors, the constraints need to know where to put their derivatives. This can be done by pointers, or a simple matter of indexing by number all your constraints and the particles. The index of the i-th constraint is just i (assuming all the constraints are scalar functions), and the indices of j-th particle are 3j through 3j+2, for the x, y, and z components respectively. The derivative of constraint Ci with respect to the y component of particle pj goes into element (i, 3j+1) of the Jacobian matrix.
Skeleton code
The skeleton code provides a viewer for your particle system. It allows you to control the camera, playback the simulated results, and render images. You will need to build the solution for particlesystem-app in Visual Studio2010, Visual Studio 2008 or Visual Studio 2005. For some operating systems, you might have to rebuild all the dll files for FLTK. Open the solution file in psys\external\fltk-2.0.x.r5966\ide\vcnet2005\fltkdll.sln. After you build the dlls, you can find the output files at \fltk-2.0.x-r5966/lib. You need to copy those files to the directory of executable file, psys\bin , because that is where the executable of the skeleton code is stored. Which files do you need to copy to psys\bin? You can figure that out from the error message when running the skeleton code. An easier way to figure this out is to look at the timestamps of the files in \fltk-2.0.x-r5966/lib right after you build fltkdll.sln. Those dll files that you just created (or modified) must be the ones needed by skeleton code. Running fltkdll.sln in debug mode and release mode will generate different dll files. Make sure you have them both copied into psys\bin. Similarly, some operating systems might require you to rebuild VL library. Just go to \psys\external\vl folder and run the vl.sln file.
Before you start coding, you need to fully understand the functions in Main.cpp. onTimer() is an event handler based on FLTK timer. It is called every time UI is being updated or the timer reaches zero. Your simulation procedure should be called inside of onTimer(). The skeleton code provides three simple cases. You can use "switch case" button in the program to switch between them. It needs to be replaced by the real simulation code written by you. You also need to extend the DataManager class to store other information of the particles, such as mass, velocity, and force accumulator. Besides those classes defined in the skeleton code, you need to add other classes or files for forces and integration methods. Finally, the OpenGL drawing function needs to be replaced with your code. You can find it at WindowGLDisplay::render().
To simulate the motion from UI, simply click on the button with a hourglass icon and click again to stop the simulation. The skeleton code set the total simulation frame to be 60 in the code. You may want to change it using your UI. You will notice that the control panel at the bottom of the window becomes activated after you run the simulation. Now you can use those sliders and buttons to playback the motion you just simulated. Changing the value of FPS adjusts the speed of the playback.
If you want to generate a sequence of images for the simulation result, hit the button with a camcorder icon. Select the desired range of motion using Begin and End sliders and hit Play button. This will dump a sequence of numbered images named “Capture##.tga” in your project directory. You can also use the button with a camera icon to take a picture of the current scene. An image named “ScreenShot,tga” will be generated in your project directory.
The following commands are used to control the camera.
shift + left click: rotate
shift + control + left click: pan
shift + alt + left click: zoom
Besides OpenGL, the skeleton code uses two external libraries, FKTK and VL. FLTK is a cross-platform GUI library. You can find complete tutorial on its website if you wish to change or add GUIs to the skeleton code. VL is a free vector library that provides a set of vector and matrix classes, as well as a number of functions for performing arithmetic with them. Both generic (arbitrarily-sized), and fixed-size (2, 3 and 4 element) vectors and matrices are supported.
Extra points
-
1.Make a snow “globe”. Instead of using a cube, create a particle system in a sphere with all the functionality described above.
-
2.Implement particle-particle collision detection and response. Demonstrate this feature using your snow cube.
-
3.Implement additional types of constraints for the tinkertoy. If the constraint outputs more than a single scalar, you need to modify the indexing scheme for the global matrices and vectors so that the constraint evaluations and derivatives are stored in the correct places. Each extra constraint is worth one present.
-
4.To make your tinkertoy simulation interactive, implement a mouse-spring as follows: each time the mouse button and the shift key are pressed at the same time, find the particle closest to the mouse at that moment. Apply an attractive spring force (damped, with zero rest-length) between that particle and the mouse until the button is released. Let the “mouse force” Fm be computed by Fm = km (Mx - px, My - py) with km > 0. In order for your simulation not to get out of control, you will want to add a damping force Fd of the form Fd = -kd v where kd > 0, so that the total force F is F = Fm + Fd. You should also be able to turn gravity forces on/off in your system.